We have made our mobile hardware integration plug-in able to print labels on the Zebra ZQ630 RFID and compatible label printers, including reading and writing UHF RFID tags embedded in the labels. Gonector print labels directly via Bluetooth using the Zebra Programming Language, known as ZPL, so you don’t have to rely on wi-fi or AirPrint. Printing labels with Gonector is fast, reliable, and your scripts can have 100% control on what’s printed and where.
See how easily you can implement it in the following video:
You can print text in various sizes, place it precisely where you want it, and even rotate it if necessary. You can also print different barcodes and 2D codes, without having to render them in FileMaker. When printing a label with an embedded RFID tag, you can automatically pair the RFID with the data by either reading back the tag's unique ID, pre-filled by the vendor in the EPC memory bank, or overwrite it with your own identification data.
Let’s implement label printing with Gonector into your own custom FileMaker app in 4 easy steps:
1. Get the plug-in
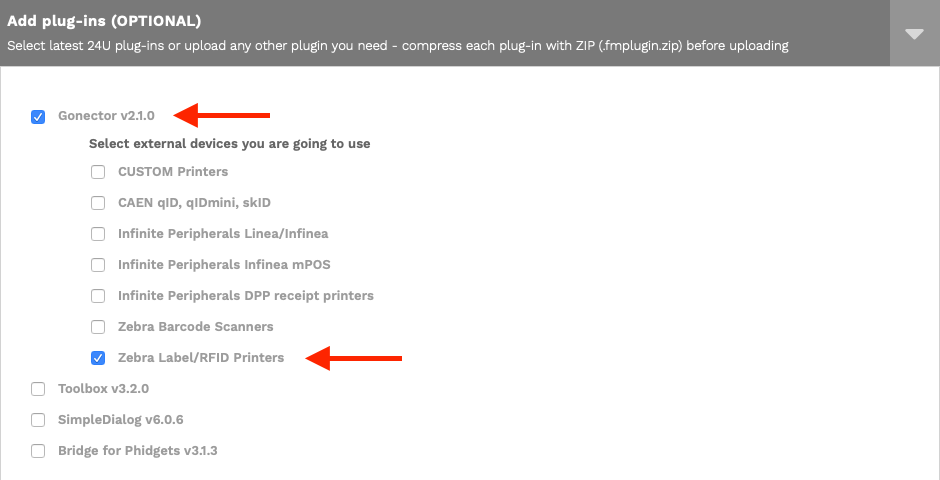
You will need to have Gonector installed for this to work. Gonector a FileMaker plug-in that comes in two parts. First part is a dummy plug-in for FileMaker Pro, which only simulates the hardware features, but lets you create your scripts and calculations. The second part is a plug-in for the FileMaker iOS App SDK which makes the functionality available to your app running on iPhone or iPad. You can avoid the complexity of working with the iOS App SDK by using Xgode and including Gonector in your app simply by clicking the right checkboxes:
2. Prepare the app
Once you have the plug-in ready, you can prepare your app to work with RFID. You can choose to either write your own item identification to the user memory of the RFID tags, or just read the unique ID that comes pre-encoded in the tags from the manufacturer.
For our tutorial we chose to use the pre-encoded IDs because that way we did not have to worry about making our own IDs fit in the tag’s memory or not to collide with any existing 3rd party tags. So we added an extra RFID field to the database.
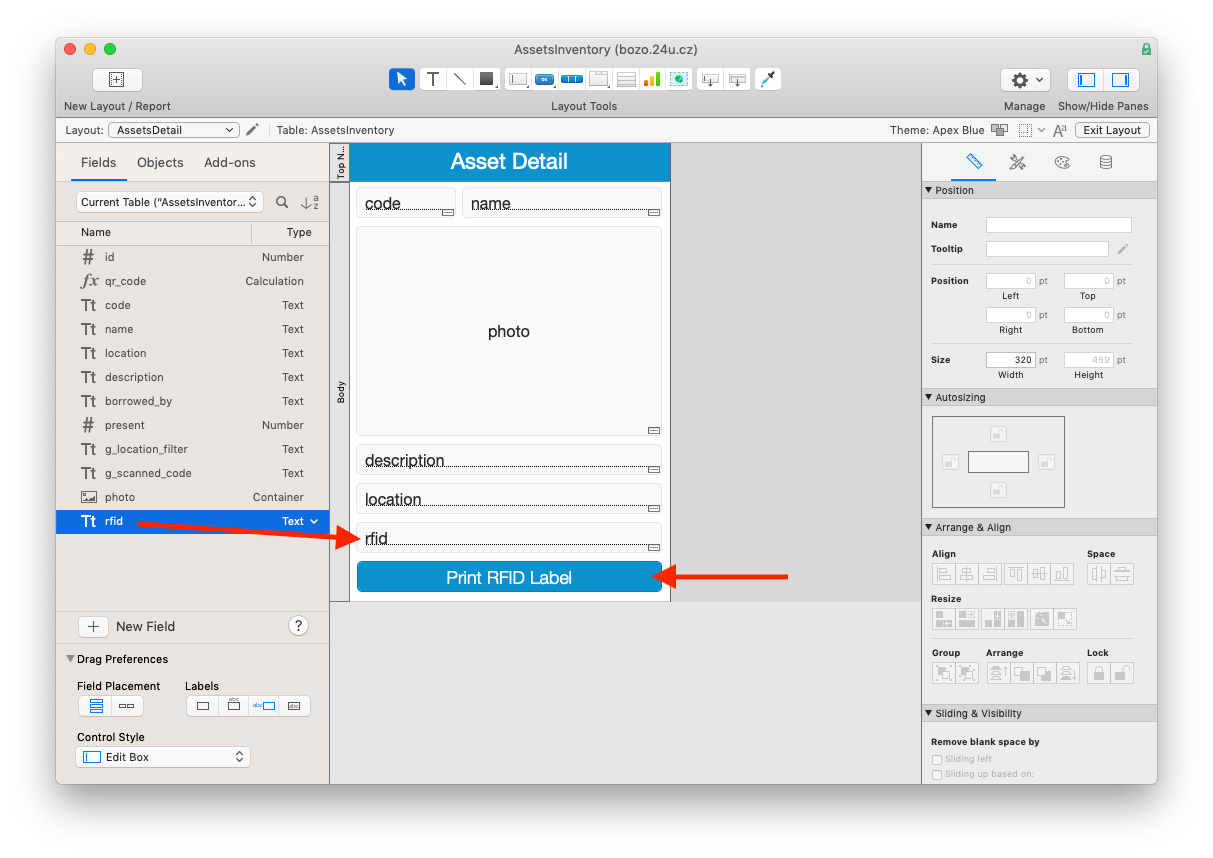
We also added a simple button to trigger our label printing script. That single script will take care of both printing the label and reading the RFID data from it back to our RFID field.
3. Design the label
Printing labels using Gonector is handled completely by scripts and calculations, but it’s still a good idea to prepare the design of your label visually before implementing your scripts, as it makes it easier to figure out the coordinates of each information item.
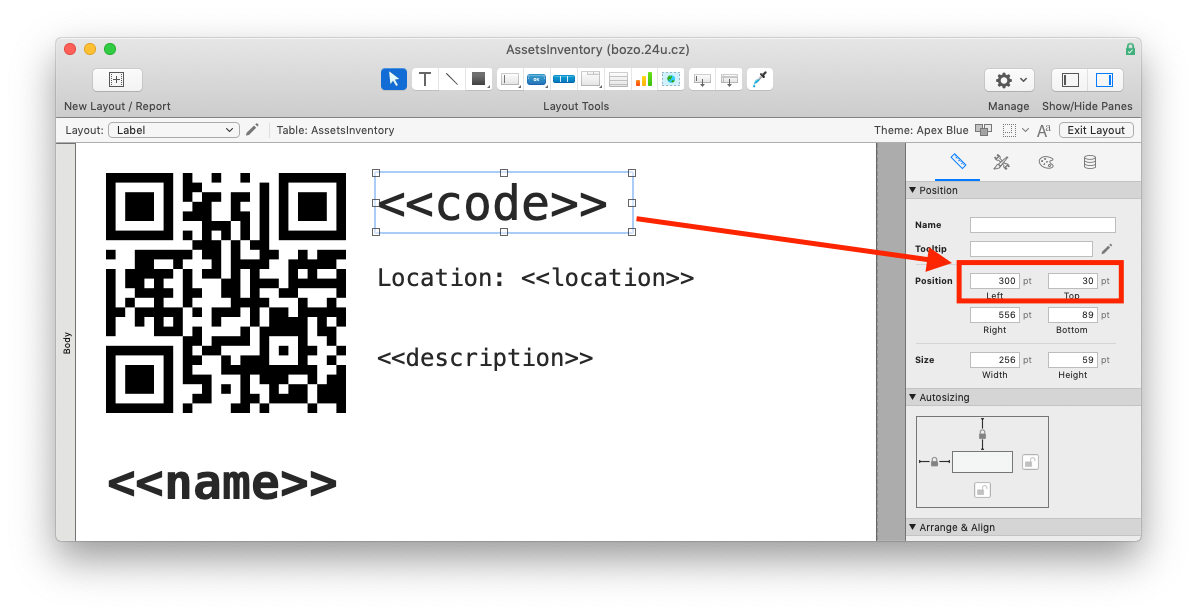
In our case we used a special layout for this and made its size in points match the actual RFID label size in printer dots. That way we could easily map points to dots when providing coordinates to the printer.
4. Script the printing
Finally, you need to create the script that will print your label and read the RFID data from it.
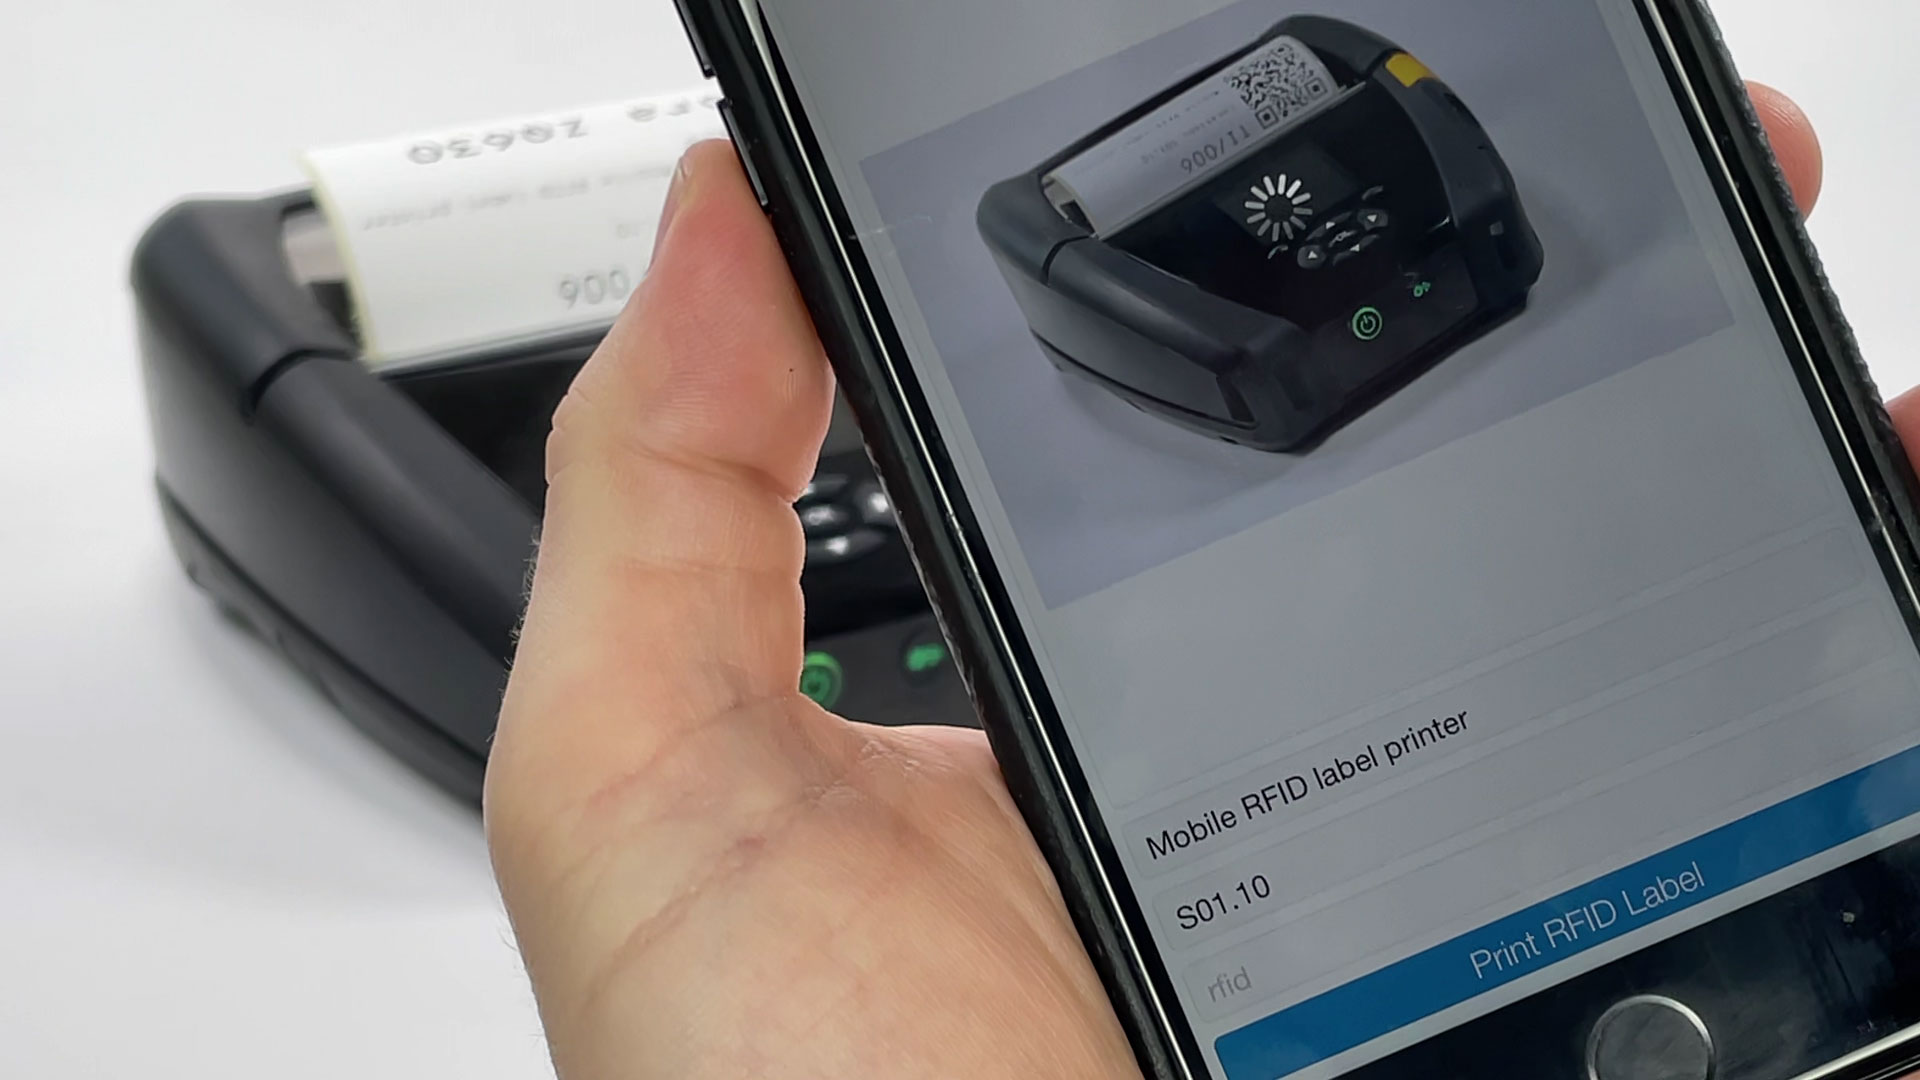
Before printing it’s important to connect to the printer. Gonector uses Bluetooth to do that, so you can use it anywhere, even outside of any wi-fi network range, it uses less energy than Wi-Fi and it’s easier to set up.
Gonector uses the Zebra Printing Language (ZPL) to talk to the printer in a way it understands, so that it does exactly what you want it to. But to keep it simple, you can just use Gonector’s easy to understand script steps and the plug-in will translate that to ZPL for you.
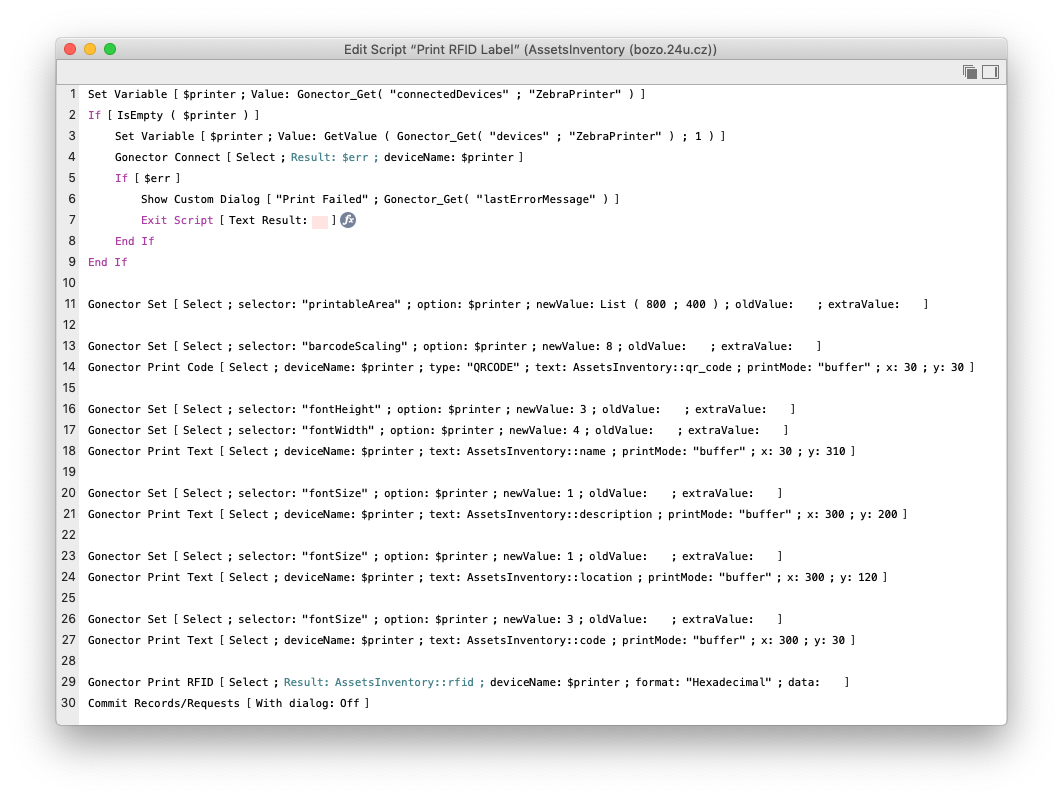
As you can see from the screenshot, the script steps are mostly self-explanatory. When you use the “Gonector Print RFID” script step, it will automatically read or write the RFID tag’s user memory while printing on the label. This way you can easily capture the label’s built-in identification to the corresponding field in your database in order to safely pair the label with the database record.
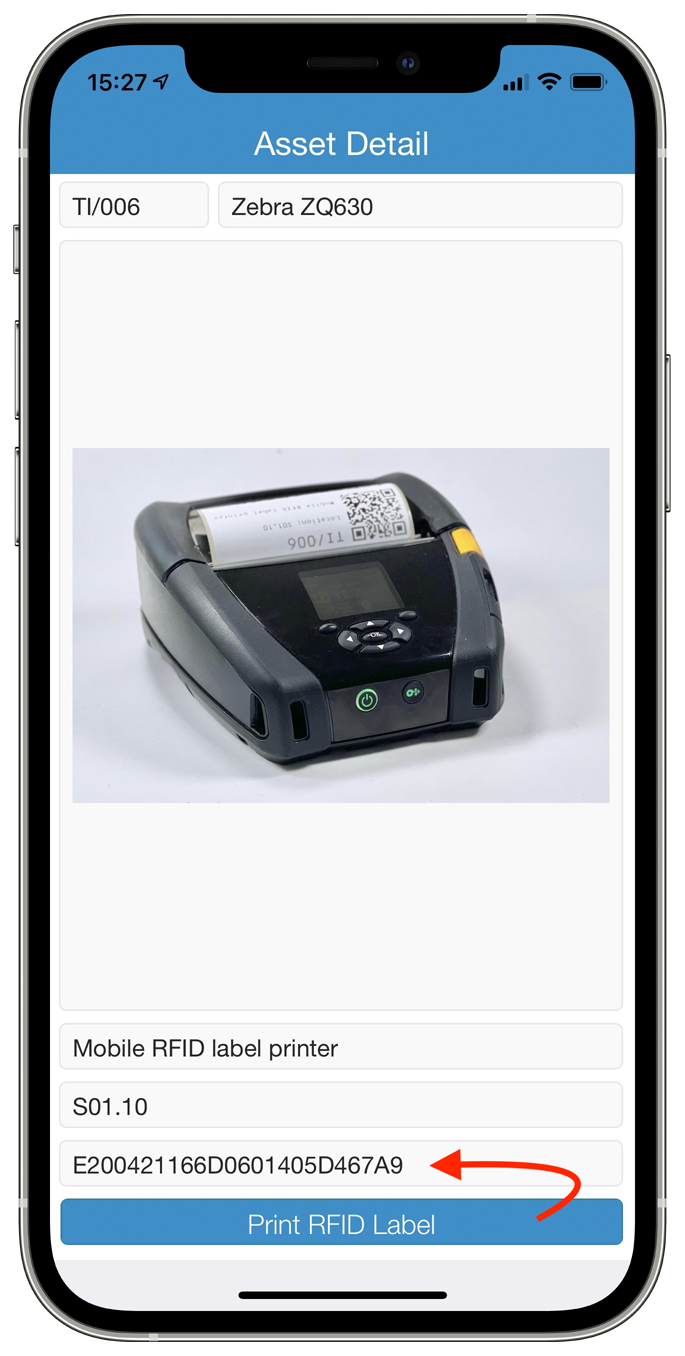
And this is all it takes to print labels, with or without embedded RFID tags, over Bluetooth, directly from your custom FileMaker app running on an iPhone or iPad. Are you ready to try it out? Let us know if you need any assistance.


