Have you ever dreamed of being able to generate high quality scalable barcodes in FileMaker solely using calculations, with no plug-ins, fast enough, in a way compatible with server-side scripts, FileMaker Go and FileMaker WebDirect, and completely free of charge? Your dream has just come true.
If you are not fan of reading, just watch my 4-minute video:
And here you can download the example:
There may be hidden bugs just like in any other software, so please always make sure you're using the latest version (simply re-download it above). If you find a bug, please let me know and I will try to fix it as soon as possible.
How to use it
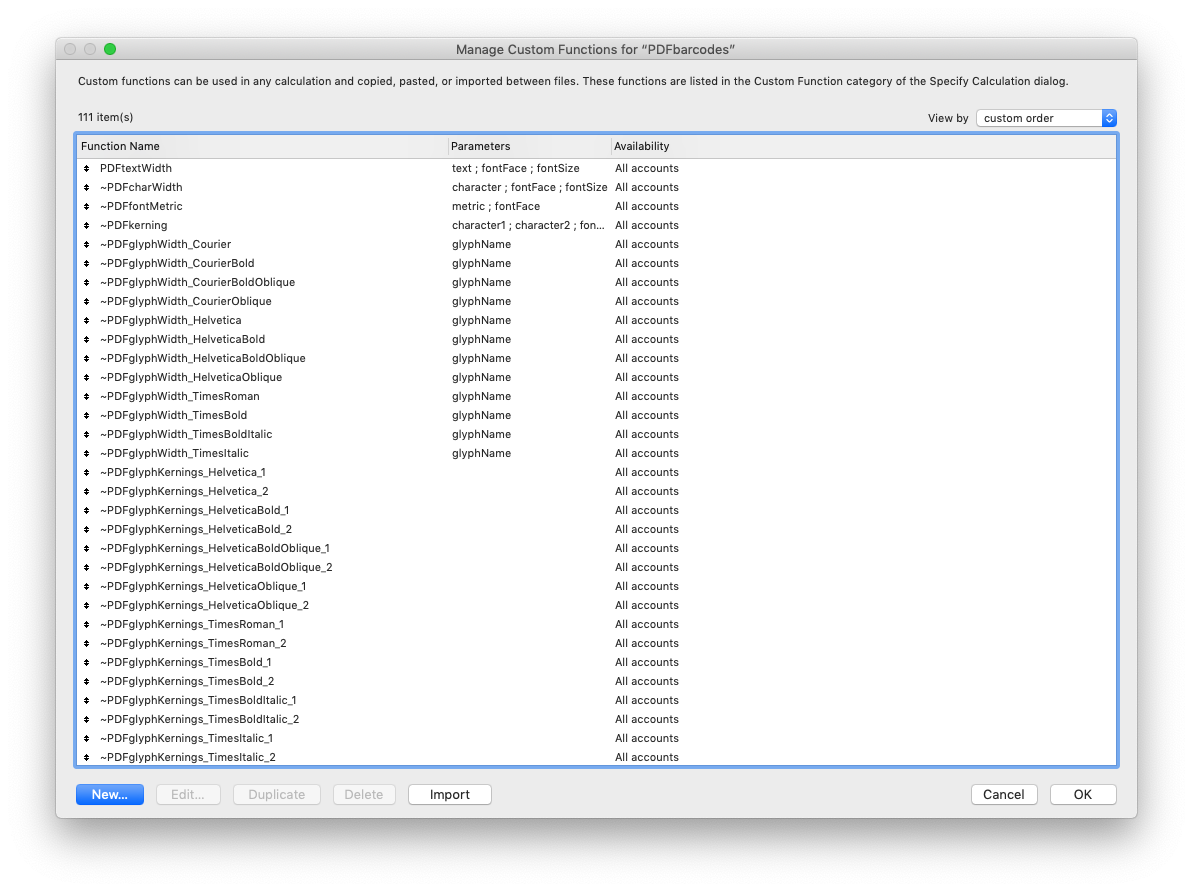
To add barcodes to your own app, simply copy all the custom functions, paste them to your database, and use the corresponding function for your barcode type in a calculation that returns Container as result.
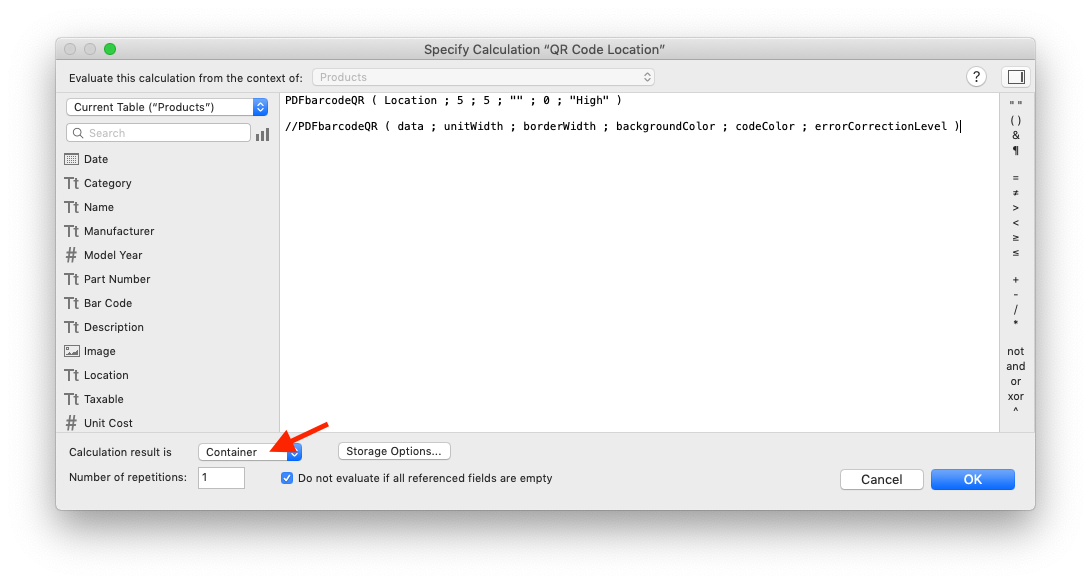
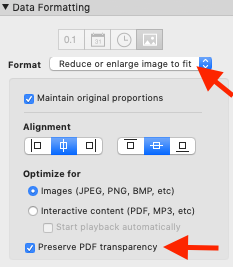
You can use the calculation directly in a calculated field, or in a script that sets the result to a container field. Once you have the field ready, add it to your layout, and make the container stretcheable.
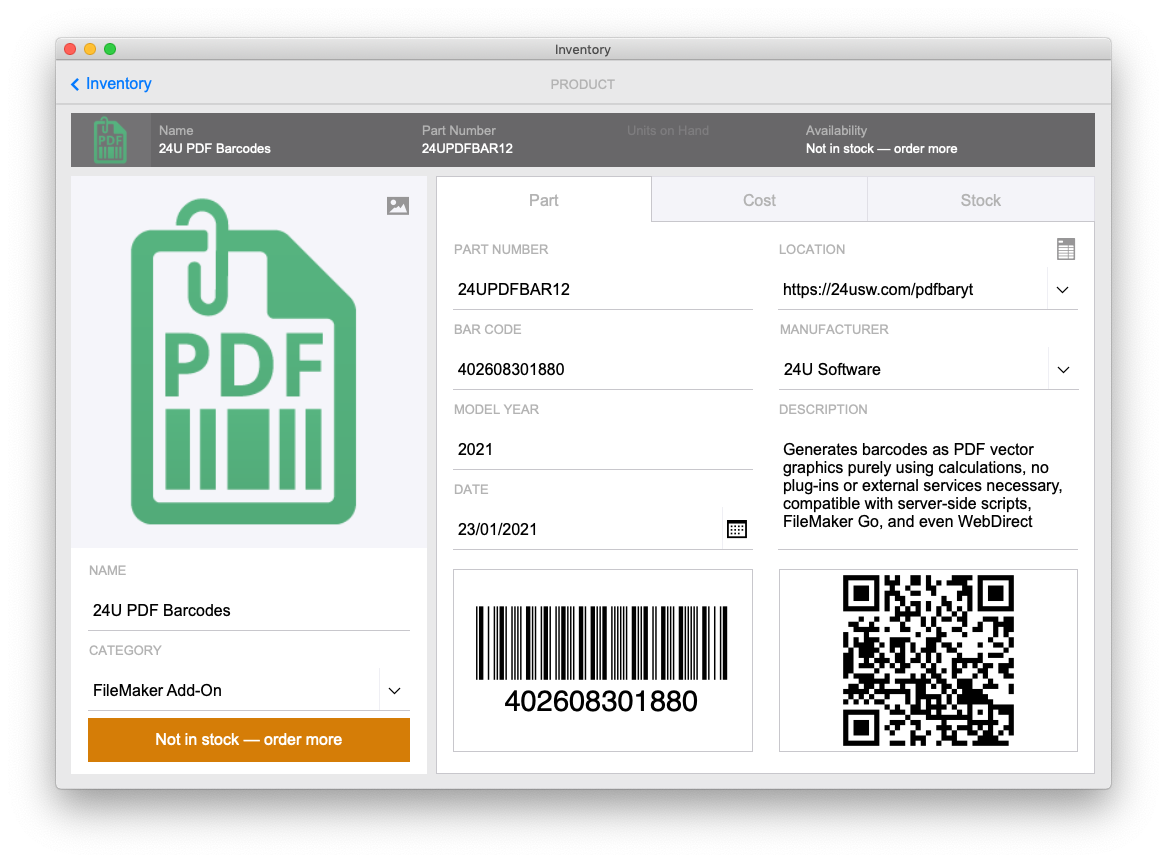
And that's all, now you can enjoy printable quality barcodes anywhere you want them.
If you’d like to know how I created it and how it works, read the whole story below…
Crazy idea
Probably everyone who manages inventory or assets uses or considers using barcodes. When I was working on my PDF Canvas example I really could not stop my brain from going on. What practical could I use the drawing functions for? Barcodes came to my mind almost instantly.
There were various solutions for barcodes already available, from special barcode fonts, through Brian Dunning’s custom functions using rotated underscore as a symbol primitive, various web services such as those mentioned in Anders Monsen’s article, to the award-winning Barcode Creator, and now even JavaScript based Barcode Generator add-on built into FileMaker Pro 19.
So why would I create another one? Well, each of the existing solutions actually had some limitation I did not feel comfortable about, whether it was cost, dependency on internet connection, generation performance, poor quality of the result, or inability to generate barcodes in server-side scripts. Just as an example, how quickly can you find a way to generate QR code, which looks good at any scale, with no tiny white lines between individual pixels?
But most importantly, as a tech-nerd who loves to achieve the impossible, I really could not resist the opportunity to find out whether I could build a new solution, not having a single one of these limitations.
The goal
I defined my goal as the following set of objectives:
- Support all barcode types FileMaker Go 19 can natively recognize
- Compatible with all flavors of FileMaker: Pro, Server (JavaScript disqualified), Go, WebDirect
- Functional off-line (web services disqualified)
- Easy to implement (Brian’s custom functions disqualified)
- Easy to deploy (special fonts disqualified)
- Faster than Barcode Creator (Barcode Creator disqualified ;-))
- Result must look nice at any size (hopefully OK thanks to the PDF format)
Based on all the disqualified technologies, all the weapons I was left with were scripts and calculations. And because of the performance, implementation ease and deployment ease, staying within the realm of custom functions was the obvious choice.
Code 39 as the first step
I decided to start with something easy, so I chose the Code 39 barcode. In this type of barcode, every encoded character is represented by a combination of 5 bars and 4 spaces, that’s 9 elements total, out of which exactly 3 are wide, the other ones are narrow. 3 of 9 is what the name of this barcode type comes from. The Wikipedia page explaining it fits on 3 pages in my default web browser window size and contains all information you need to successfully implement it.

Implementing the symbol generation itself was pretty straightforward. I just had to get rid of any invalid characters and then replace every remaining character with the right corresponding sequence of rectangles and spaces between them. What I found more challenging was including the barcode data as text in the result.
Text is Vext
Just like Vext is the fictious god of misfortune, text in PDF can be a source of headaches. That’s because position of text in PDF is always specified by the bottom left corner of the first character’s bounding box. So if you want to center-align text around specific position, you have to precisely calculate its width, for which you have to know the metrics of every character and the right spacing of each characters pair.
For this purpose I added metrics of the standard PDF fonts Times, Helvetica and Courier to the example as additional custom functions.
What I found a bit inconsistent between the individual standard fonts is how numbers and other characters are positioned within their bounding boxes. For example, Helvetica and Times both appear to have numbers slightly smaller, so they appear like being a little bit shifted down. I tried my best to make it look good, but you may still find the placement of text in the barcodes a bit inaccurate.
Other linear barcodes
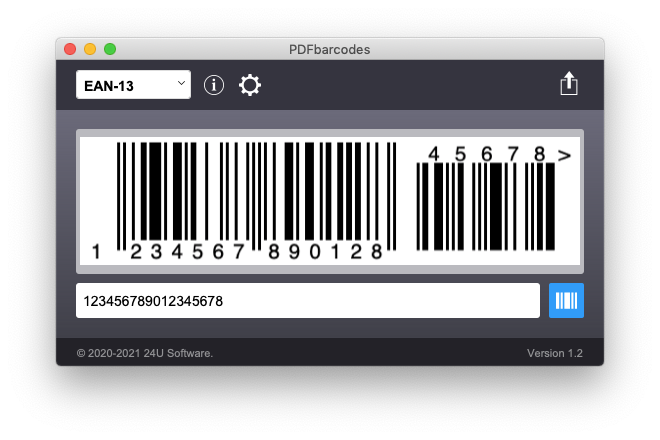
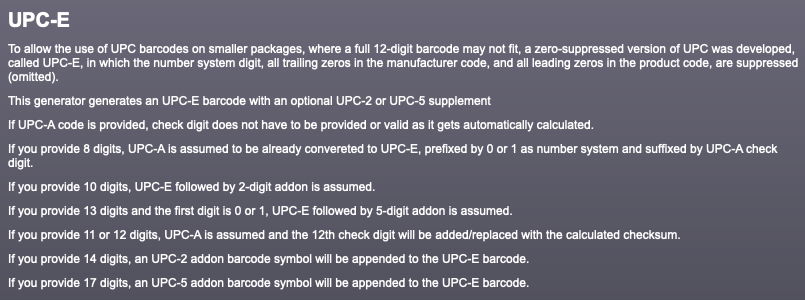
Once I had Code 39 working and text positioning headaches were over, it was relatively easy to add all the other linear barcodes (codes consisting of series bars and spaces). Code 93 and Code 128 were similar to Code 39, while EAN and UPC codes added some complexity. These codes are designed to encode fixed-length numerical GS1-compliant article identifiers and also include a special parity digit to allow for reading error detection.

Both UPC and EAN codes can also have a supplemental code attached, encoding either 2 or 5 numeric digits. The 2-digit addon codes are typically used on periodicals to encode current year’s issue number, the 5-digit codes can be found on books and weighed products to indicate suggested retail price.
To make my functions easy to use I simply made them decide what version of EAN or UPC barcode to generate based on the number of digits provided.
When I got to implementing ITF-14, I needed to use multiple sources, not just the wikipedia page about it. I initially implemented it simply the same way as the other GS1 identification barcodes based on the Interleaved 2 of 5 description. Later on, when studying the official GS1 specification, I learned that the black “Bearer Bar” has quite exact requirements, so I added it to the function as well.

The linear barcode I was hesitating with a little bit was Codabar. The reason is that there is no single standard on how data should be encoded in it. It allows different start/stop characters to be used and the actual choice of these characters is often how organizations differentiate their codes from others. There is also no single common standard on whether/how to calculate checksum.
I ended up deciding to generate Codabar with A/B start/stop characters used by libraries if only numbers are supplied, but you can also explicitly provide the code data including the start/stop characters of your choice. Calculation of checksum, if desired, is on you.

As a bonus I also created a function to generate an arbitrary barcode, simply by providing a sequence of numbers representing widths of bars and spaces. You can use this function to generate any custom linear barcode, even not compliant with any of the mentioned standards. This can be useful for creating special barcodes, such as those used for configuring barcode scanners.
As an exercise, try to find out what number is represented by the following custom code:

Share your guess (or discovery) on Facebook or Twitter along with the link to this article…
2D (bar)codes
All linear barcodes share one common limitation. They can encode only very limited amount of data on a reasonably small surface. Therefore 2D codes got invented. They should really not be called barcodes as they typically consist of pixels, rather than bars…
If the 2-dimensional placement of encoded data was the only difference, implementing 2D codes would be easy peasy. But it’s not. In order to be reliably readable, 2D codes use more than just simple parity to deal with reading errors. They use special error-correcting codes based on finite-field mathematics. Specifically, all the 2D codes supported by FileMaker Go at the time of writing this use different variants of Reed-Solomon codes.
The obvious benefit is that 2D codes can be successfully read even when they are partially damaged by scratches, dirt or poor light conditions.

The disadvantage is that finite-field math is a bit complicated and requires a lot of processing power, especially on usual binary computers.
Even though I do like math and finite fields (aka Galois fields) are fun to work with, I didn’t want to reinvent the wheel, so I found a few open-source barcode and Reed-Solomon generators and ported parts of their code to FileMaker calculations.
I started with the Aztec code and based it on the Metzli open-source generator written in PHP.

Porting PHP code to FileMaker calculations was quite a job but I made it work and got my first Aztec code generated. But the speed was not ideal, especially for larger amounts of data to encode. For instance, generating Aztec Code for 100-character string took over 27 seconds on my MacBook Pro.
So I had to dive deeper into the finite field math and optimize the code for the FileMaker calculation engine a bit. Long story short, I manage to cut the 100-character string encoding down to 3.6 seconds.
The next code type I implemented was Data Matrix. This type of 2D code is often used for marking small items, because it can be really compact yet still very reliably readable.

It turned out to be a bit simpler than Aztec code because it uses only one size of Galois field for all possible code sizes. What’s interesting about this code is that for smaller amounts of encoded data you can choose it to be either square or rectangular.

Adding PDF417 as the next code type was mostly relaxing because it’s not a proper 2D code but rather a stack of 1D codes. It does also use Reed-Solomon error correction, but luckily a simple implementation was available as open-source with pre-calculated multiplication factors. Thanks to that I could make the PDF417 code generation faster than the other ones.

Finaly, the king of 2D codes, undoubtedly the most popular type of today, is QR code. Originally designed in Japan for the automotive industry, it has become de-facto standard for sharing web links to be scanned by mobile phones.
QR code reduces the processing power necessary for encoding the Reed-Solomon error correction words by splitting larger amount of data to smaller chunks, but it adds more processing after the base code is generated by applying one of eight different mask patterns. To comply with the standard, all 8 masks need to be tried and readability score has to be calculated for each in order to select the one that produces the most readable code.

One specialty of QR code is that it supports Japanese Kanji as one of possible text encodings, but to save some hassle I have not implemented that in this version of my example. UTF-8 is accepted for encoding Japanese text according to the standard, it is just not as efficient as using the native Kanji encoding would be.
Lot of fun with useful result
I have to admit that porting PHP, C and JavaScript code to FileMaker calculations and playing with Reed-Solomon codes was fun I spent a lot of my free time with. I very likely practiced the While function more than any other FileMaker developer on this journey.
I also had to omit one of the barcode types supported by FileMaker Go, the GS1 DataBar, due to the fact that I did not find sufficient technical specification online. It is available as the ISO/IEC 24724:2006 standard but all public sources I found were limited to describing what DataBar can do but not how it is supposed to be generated.
Other than that, I believe I can say that I reached all my other goals I set at the beginning, and you can take advantage of that as well. Do you like it? How are you going to use it? And what do you consider the biggest advantage? Don’t hesitate and let me know.
Update on Mentions
It seems this example is getting noticed, which I am glad for, so as my thanks, let me link back to where it was mentioned. If you mention PDF Barcodes in your own article and let me know, I will gladly add a link to your piece below:
- Hausgemacht: Barcodes in FileMaker by Karsten Risseeuw @ FileMaker Kompetenz
Feel free to also share this in social media by clicking on the icons below...